5 Things Your Trail Camera Data Is Telling You Right Now How to Analyze Last Season's Data Like a Wildlife Biologist
Turn your trail‑camera archives into actionable hunting intelligence. This article shows hunters how to run a survivor audit, build movement‑timing profiles, map pressure‑response patterns, grade food plots, and close camera coverage blind spots so off‑season work produces measurable results. “Your trail cameras just finished one of the most information‑rich assignments in the history of your hunting property.” “Trail camera data is not a highlight reel. It's a biological record.”
Allen
4/9/202613 min read
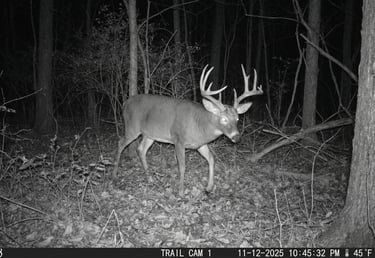
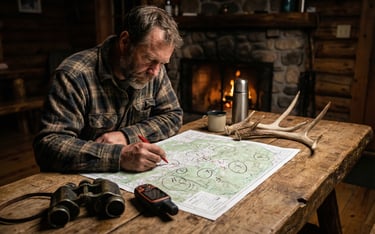
Your trail cameras just finished one of the most information-rich assignments in the history of your hunting property. They sat out there through summer velvet, September scrapes, October cruising, November chaos, and late-season feeding — collecting photographic evidence of every deer that walked past, at every hour, in every weather condition. And right now, most hunters have those SD cards sitting in a drawer somewhere, completely unanalyzed, while the best scouting window of the off-season quietly slips away.
That's the hunting equivalent of receiving a full intelligence report, stamping it 'received,' and filing it away without reading it. Both the Navy and the Marines would have something to say about that — though knowing those two, they'd probably argue about whose fault it was for the next forty-five minutes before anyone actually read the report.
Trail camera data is not a highlight reel. It's a biological record. Analyzed correctly, last season's images tell you which bucks survived, when and where deer were actually moving, how your property responded to hunting pressure, what your food sources did and didn't deliver, and where your scouting blind spots are. Every one of those answers has direct implications for what you do differently this year.
Here are the five things your trail camera data is telling you right now — if you're willing to sit down and actually listen.
Your Survivor Bucks Are Already Identified
The first and most immediately actionable thing your camera data tells you is simple: which bucks made it. Cross-reference every buck you have documented from last season against your harvest records, your neighbors' harvest reports, and any roadkill or shed data you've collected this spring. Whatever bucks you can confirm on camera after the close of season — or whose sheds you've matched to camera images — are confirmed survivors. Those are your priority targets for next fall.
This sounds obvious, but most hunters skip it. They flip through last season's images looking for their favorite buck, don't see him, assume the worst, and move on. That's not analysis — that's a feeling. Feelings don't fill a freezer or put a mature buck on the wall. Data does.
How to Run a Proper Survivor Audit
Pull every camera location's archive from October 1 through the end of season. Build a buck inventory — even a rough one on a legal pad works — with each identifiable buck listed by nickname, approximate age class, and last confirmed date on camera. Then work through the following questions for each deer:
• Was this buck photographed after the firearms season opened in my area? If yes, he likely survived at least that portion of the season.
• Do I have a shed match from this spring that confirms he cast antlers — meaning he survived winter? Matched sheds are the gold standard of survivorship confirmation.
• Did a neighbor or hunting buddy harvest a buck that matches this deer's description? Make the call. Ask the question. Inter-unit communication is always worth the awkwardness.
• Is this buck simply absent from post-season cameras with no confirmed harvest? That's not evidence of death — it's evidence of a gap in your camera coverage. Don't write him off yet.
Biologist's Note: Absence of evidence is not evidence of absence.
A buck that disappears from your cameras in November may have simply shifted his range in response to hunting pressure, breeding activity, or late-season food source changes. Before you assume he's dead, audit your camera placement. If you only had cameras on two or three locations, you have coverage gaps large enough to lose an entire deer's fall range. Confirmed harvests are evidence. Missing from camera is a data gap. Know the difference.
Once you've completed the survivor audit, you have your target list for next season. Not a wish list — an evidence-based list of specific animals with known range, known behavior patterns, and known responses to pressure. That's the difference between hunting a deer and hunting a ghost. One of them is a strategy. The other is hope wearing blaze orange.
Your Movement Timing Data Is More Valuable Than You Think
Every trail camera photo has a timestamp. Most hunters look at the image. Biologists look at the timestamp. That single habit change — shifting your analytical focus from what the photo shows to when the photo was taken — unlocks an entirely different layer of intelligence from your existing data.
Movement timing is not random. Whitetail deer operate on internal biological clocks that are influenced by photoperiod, temperature, moon phase, hunting pressure, and food source availability. When you analyze timestamp data across dozens or hundreds of images at multiple camera locations, patterns emerge that you cannot see by hunting alone. These patterns are repeatable. They are predictable. And they tell you exactly when to be in the stand for each phase of season — which is information that no amount of campfire conversation or internet forum debate can replicate.
Building a Movement Timing Profile
For each major camera location, sort your images by month and categorize them into three time windows: dawn activity (30 minutes before to 2 hours after sunrise), midday activity (2 hours after sunrise to 2 hours before sunset), and dusk activity (2 hours before to 30 minutes after sunset). Count the images in each window, by month.
What you're building is a seasonal movement timing profile for each section of your property. It will almost certainly reveal the following:
• Early season (September through mid-October): Heavy dusk activity near food sources. Dawn activity near bedding. Midday activity near zero for mature bucks. They are not moving at noon. Stop hunting at noon thinking you'll catch a big deer still on his feet. You won't. He's been bedded since 8 AM and he's judging you.
• Rut phase (late October through mid-November): Midday activity spikes dramatically, especially for mature bucks. This is the one time of year when a shooter can appear at 11 AM on a Tuesday with no warning whatsoever. Your timestamp data should show this clearly. If it doesn't, you may not have cameras in the right locations to capture cruising bucks.
• Post-rut and late season (late November through January): Activity compresses back to low-light windows, often tighter than early season. Bucks are recovering, caloric needs are high, and risk tolerance is low. Thermal conditions drive midday bedding location. Your data will show shorter, more predictable movement windows.

Pro Tip: Temperature is a hidden variable in your timestamp data.
If you recorded daily high and low temperatures alongside your camera data — even roughly — you can correlate movement activity with temperature drops. In the whitetail world, a cold front is a starting gun. A ten-degree temperature drop in 24 hours will move deer that have been completely nocturnal for two weeks. If your data shows a cluster of midday images on specific dates, go back and check the weather history for those dates. You'll find cold fronts almost every time. That's not coincidence. That's biology — and it's repeatable every single year regardless of what the moon is doing, what the internet says, or what the guy in the next stand swears by.
Your Pressure Response Patterns Are Mapped
This is the one that makes most hunters uncomfortable, because it requires honest self-assessment. Your trail camera data doesn't just show you what the deer were doing — it shows you what the deer were doing in response to you. And for most hunting setups, that picture is not flattering.
Pressure response is one of the most biologically significant and consistently underestimated factors in mature buck hunting. A whitetail buck that reaches 4.5 years of age has survived multiple hunting seasons by learning — at a neurological level — to associate human scent, sound, and sight with danger. He doesn't consciously decide to go nocturnal after you hang a new stand on October 10th. He does it instinctively, rapidly, and with a precision that would impress any surveillance counter-intelligence unit. Trust me. I've worked with both deer and military planners. The deer are faster.
How to Read Pressure Response in Your Data
Pull your camera archives and look for the following patterns. Each one is a diagnostic signal about how hunting pressure shaped deer behavior on your property last fall:
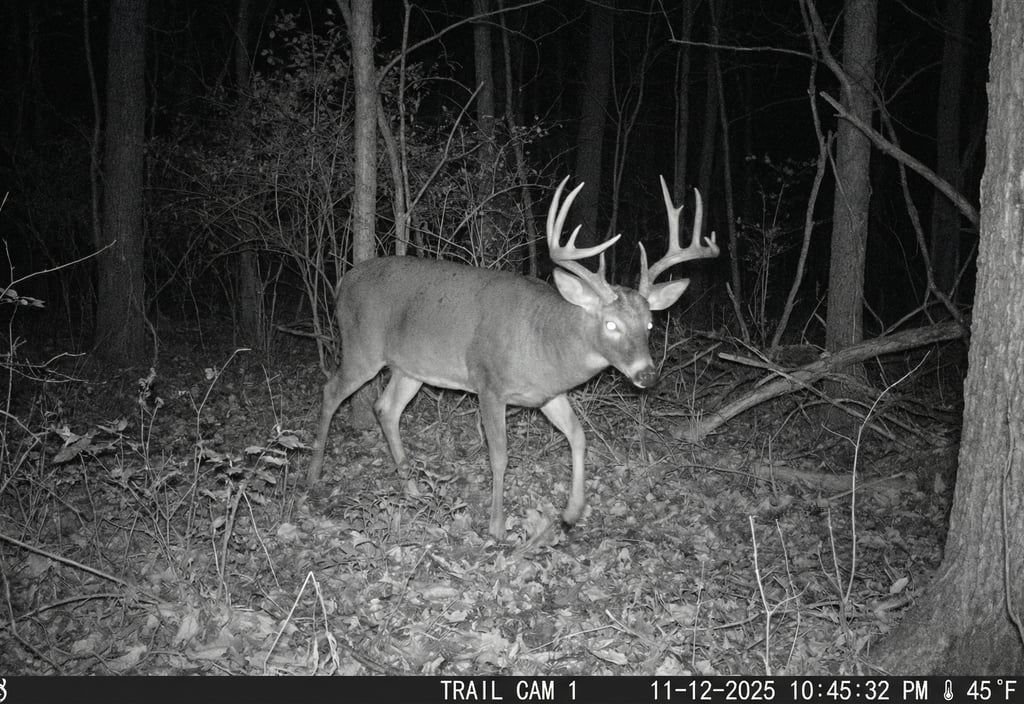
The Nocturnal Shift: If a mature buck that was appearing regularly at dawn and dusk in September becomes exclusively nocturnal by late October — showing up only between midnight and 4 AM — that's a pressure response, not a natural behavioral shift. Something changed in his environment that elevated his perceived risk level. That something is usually boot traffic, scent contamination, or stand entry/exit disturbance. Your cameras just told you where you burned a location. Mark it.
The Disappearing Act: A buck that appears frequently in September and early October, then simply vanishes from all cameras by November, has either been harvested, shifted his range in response to pressure, or found a section of your property where you don't have cameras. Before you assume he moved or died, audit your camera coverage honestly. If you had three cameras covering 200 acres, you have massive blind spots. The deer didn't vanish — your coverage did.
The Does-Only Window: If your cameras show does and fawns moving freely during daylight hours in October while mature bucks are exclusively nocturnal, your property has a pressure problem. Does are less risk-averse than mature bucks, but they're not immune to pressure either. If does are moving in daylight but bucks aren't, the bucks have specifically learned that your property — not the general area, your property — is a high-risk zone during shooting light. That's a solvable problem, but you have to see it in the data first.
The Stand-Specific Pattern: Compare daytime buck activity at camera locations nearest to your most-used stands versus locations far from stand pressure. If you see a consistent difference — more nocturnal behavior closer to heavily hunted areas — your cameras just mapped your pressure footprint for you. This is invaluable. Most hunters feel their pressure impact. Your data lets you see it precisely.
Field Reality Check: How many times did you access that stand?
Pull your hunting log alongside your camera data and count the number of times you accessed each stand location last season. Now look at the camera timestamps for mature bucks at the nearest camera to that stand. Is there a correlation between your access frequency and the shift toward nocturnal images? In 30 years of analyzing deer behavior, I've never seen a mature buck that didn't eventually respond to repeated human intrusion. The data will show it. The question is whether you're willing to look. Both the Navy and the Marines will tell you that an honest after-action review is uncomfortable. They'll also tell you it's the only way to improve. On that one, they're both completely right.
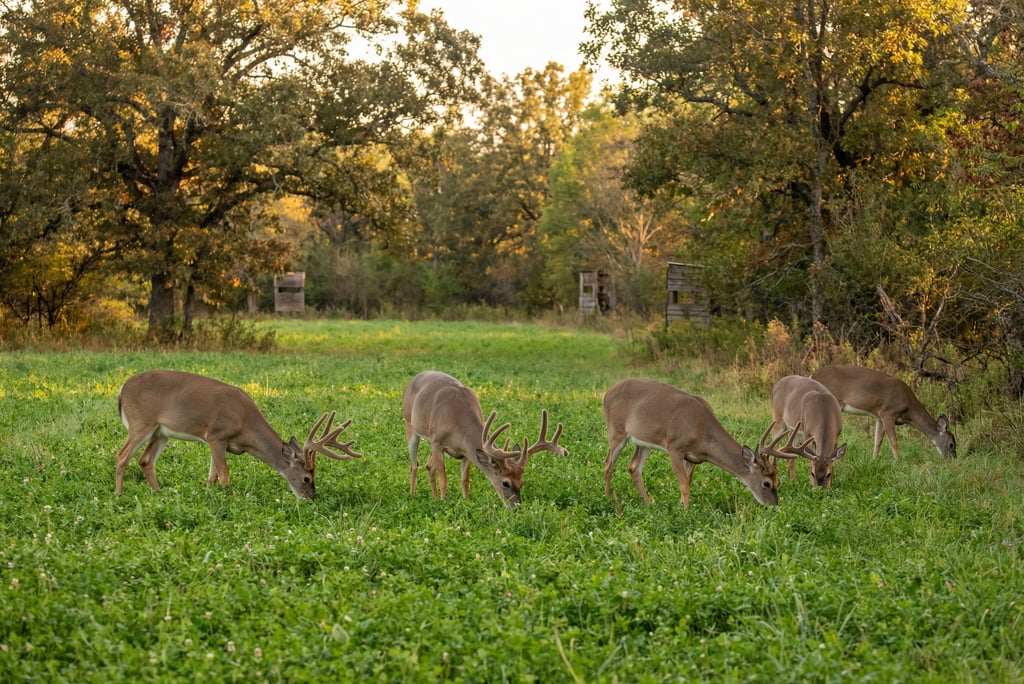
Your Food Sources Passed or Failed — The Cameras Graded Them
Trail cameras positioned near food sources — food plots, agricultural fields, mast areas, browse edges — provide a seasonal grade on each source's performance. The grade is simple: how many deer used it, at what times, and during what phase of season? That three-part answer tells you everything you need to know about whether to invest in that food source again, modify it, or abandon it entirely.
Most hunters plant a food plot, hang a camera, and declare victory when they get deer photos in August. August is free money in the food plot world — deer will eat almost anything in summer velvet when nutritional demands are high and hunting pressure is zero. The real grade comes from October through January, when food source competition is high, deer have options, and thermoregulation needs are driving feeding decisions. That's when you find out if your plot actually delivered or just looked good in August.
Reading Your Food Source Report Card
Early season camera activity (September): High activity at a food source in September is a positive indicator but not a guarantee of fall performance. Note the species mix — are you getting mature bucks, or does and fawns only? A food source that exclusively attracts does in September may not hold mature bucks during hunting season. Mature bucks often use food sources differently than the rest of the herd.
Peak season drop-off (October-November): If camera activity at a food source drops sharply in October — right when you want deer there — you have a problem with the source, the pressure around it, or both. Brassicas, for example, often see reduced use until after a hard frost triggers sugar conversion. If your brassica plot went cold in October but lit up in December, that's the crop doing what it's supposed to do. The data will show the seasonal arc clearly.
Late season performance (December-January): This is your most critical food source window. Deer in late season are in energy deficit, temperatures are at their lowest, and predictable, high-calorie food sources become absolute magnets. A food source that consistently shows daylight activity in December and January is worth its weight in seed bags. One that goes dark after November tells you the deer found something better — and your cameras can help you figure out what and where.
The bottom line on food source analysis: if you planted it, paid for it, and tended it all summer, you deserve an honest answer on whether it performed. Your cameras have that answer. Look at the data, not your feelings about the plot.
Practical Action Item: Map your food source grades before spring planting.
Before you order a single seed bag this spring, sit down with last season's camera data from every food plot and feeding area camera location. Grade each source: A (consistent daylight activity through late season), B (good activity but limited to certain phases), C (activity tapered off by October), or F (deer used it in summer and abandoned it). Let those grades drive your spring planting and improvement decisions. Spend your time and money where the data says it works. Spend nothing — or a different strategy — where it doesn't. That's how a biologist manages food sources. That's also how anyone with a functioning logistics budget manages resources, regardless of branch.
Your Camera Coverage Has Blind Spots — And They're Telling You Where to Look
This is the most underappreciated piece of intelligence buried in your trail camera data: the gaps. Not just what the cameras showed you — but what they couldn't show you because of where you placed them. Your coverage map is as important as your image archive, and most hunters have never looked at it critically.
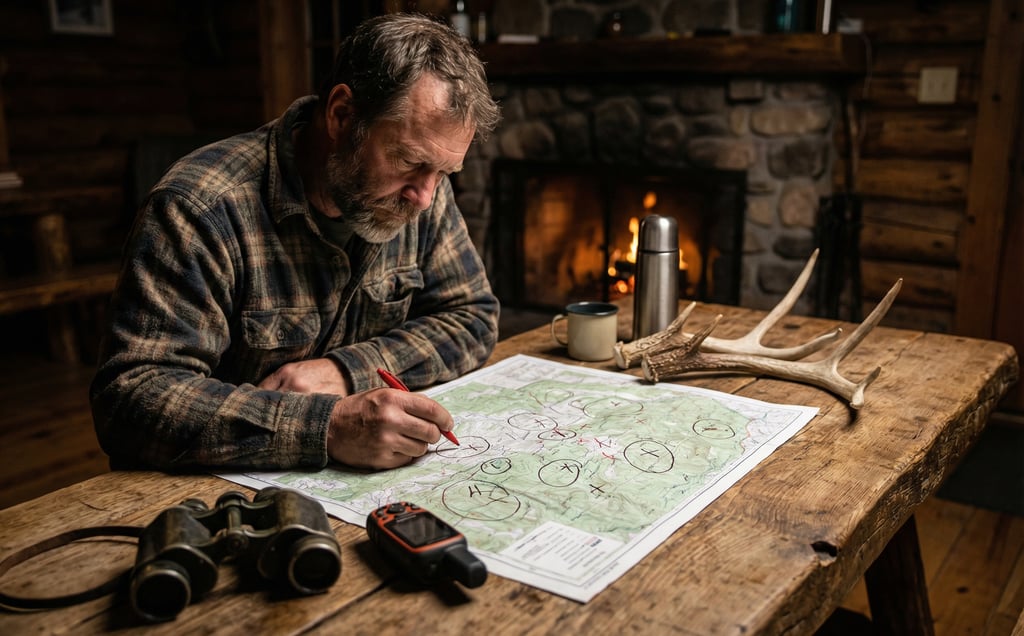
Here's how to think about it. Pull up a map of your property — OnX, BaseMap, or even a hand-drawn sketch — and mark every camera location from last season. Now draw a rough circle of effective coverage around each camera (typically 30-50 yards of reliable detection radius in most forested settings). Everything outside those circles is a blind spot. It's ground that deer used last season that you have zero photographic data on.
For most hunting properties, the blind spot coverage is staggering. I've reviewed camera setups for hunters who thought they had their property wired, only to find that 60 to 70 percent of their total acreage had no camera coverage whatsoever. Those hunters weren't hunting their property — they were hunting four or five specific spots while the majority of their land operated completely unobserved. It's a bit like the Navy having excellent sonar coverage of the harbor entrance and no idea what's happening out in the open water. Or the Marines having the beach landing covered but nobody watching the treeline. Different scenario, same intelligence gap.
Diagnosing Your Coverage Gaps
Once you've mapped your blind spots, the question becomes: what's in there? Use your existing camera data as a guide. Look for the following clues that suggest high-value unmonitored ground:
• Mature bucks appearing on cameras at the edges of your coverage map, moving in a direction that leads into uncovered ground. They're going somewhere. Find out where.
• Does and fawns consistently bedding or moving through areas with no camera coverage nearby. Fawn bedding areas are often close to doe bedding areas, which are often close to core use zones that mature bucks cruise during the rut.
• Travel corridors that your existing cameras reveal on one end but don't follow through. A buck photographed walking north at Camera A and never showing up at Camera B — which is also north — is using something between those two points that you're not monitoring.
• Terrain features on your property map that you've never placed a camera on: thick drainages, hollow heads, swamp edges, south-facing slopes. If you can identify these features on a map but have no camera data from them, that's a scouting assignment, not a coincidence.
The goal for this off-season is to reduce your blind spots systematically. Add cameras to unmonitored terrain features. Follow the movement vectors your existing data reveals. Cover the ground between your current locations. Build a coverage map that actually reflects your whole property, not just the five spots you've always hunted.
The Intelligence Principle: You can only act on what you know.
Every blind spot in your camera coverage is a decision made in the dark. You're not hunting the whole property — you're hunting your assumptions about the property. The deer don't have that limitation. They know every acre, every thermal, every trail, and every food source on your land better than you do, and they've been operating in your blind spots all season long. Closing those gaps is not a luxury. It's the foundation of informed hunting strategy. Figure out what's in the dark, map it, and hunt it with intent. That's good intelligence work — and for once, both the Navy and the Marines would agree on that without a single argument. Probably.
Putting It All Together — Your Off-Season Analysis Checklist
Trail camera data analysis is not a glamorous task. It doesn't have the adrenaline of opening morning or the satisfaction of packing out a buck. It's a desk job — quiet, methodical, and unglamorous in exactly the way that produces results nobody else can replicate because nobody else bothered to do it.
Here's your complete off-season analysis checklist, straight from thirty years of applying wildlife biology to Southern deer woods:
• Run a full survivor audit. Cross-reference every buck from last season against harvest records, shed finds, and post-season camera data. Build your confirmed target list.
• Build a movement timing profile for each camera location by month. Identify dawn, midday, and dusk activity patterns across the season. Note rut-phase spikes and late-season compression.
• Conduct an honest pressure response audit. Compare daytime buck activity near heavily hunted stands versus low-pressure locations. Count your access events and look for the correlation.
• Grade every food source camera location A through F based on seasonal consistency and late-season performance. Let the grades drive your spring planting decisions, not your preferences.
• Map your coverage gaps. Identify unmonitored terrain features, incomplete travel corridors, and blind spots. Build a camera repositioning plan for next season.
Do this work now, while the season is fresh and the data is complete. The hunters who do it — who actually sit down, pull the cards, and analyze what happened — show up in September with a specific plan for a specific deer based on specific evidence. Everyone else shows up with a feeling and a prayer.
The woods don't reward feelings. They reward preparation.
Science. Patience. Discipline. Hooyah. Carry on.
Contact
Questions? Tactical tips? Reach out anytime.
hello@biologistonbucks.com
© 2025. All rights reserved.
Attention on Deck — Image Disclaimer
The deer images on this site are a mix of AI-generated imagery and real photos taken by me personally in the field and deer woods of the Southern United States. I'm a wildlife biologist and a hunter, not a photographer. Much like the Navy taught me, you use the best available asset for the mission. A camera and a whitetail buck operate on completely different schedules, and unlike the Marines, I'm smart enough not to fight a battle I can't win.
When you see a photo tagged "Field Image" — that one's the real deal, straight from the woods. The rest are AI-generated and proud of it. Either way, the science is real, the strategies are real, and the deer in every photo represent exactly what we're all out there chasing every fall.
Hooyah. Carry on.
